

To prepare your pool for spring, start by removing and cleaning the pool cover. Inspect the area for debris and check all pool equipment for functionality. Once that’s done, refill the pool to the correct water level and activate the filtration system. Don’t forget to test and balance water chemistry levels. Finally, inspect the pool liner and reattach accessories and safety features. There are more essential steps you won’t want to miss to guarantee a safe swimming season.
The Cliff Notes
- Remove and clean the pool cover, checking for rips and storing it properly after drying.
- Inspect the pool area for debris, ensuring a clean environment to prevent contaminants.
- Fill the pool to the correct water level, monitoring for leaks and clarity.
- Activate the filtration system for at least 12 hours, checking for leaks and flow efficiency.
- Inspect safety features and reinstall safety equipment to ensure swimmer protection.
Remove and Clean the Pool Cover
When preparing to open your pool for the season, the first essential step is to remove and clean the pool cover. Start by carefully removing the cover, guaranteeing you pump off any standing water to prevent spills into the pool. Next, use a brush or leaf blower to eliminate debris on the cover. Clean the cover with a mild soap solution and rinse thoroughly, allowing it to dry completely in the sun to avoid mildew growth during storage. Inspect the cover for any rips or tears; patch or replace it as necessary. Finally, store the clean, dry cover in a cool, dry place to extend its lifespan. Following this step in your spring pool cleaning checklist guarantees a smooth de-winterizing pool process. Additionally, ensure that the pool pump is functioning properly before filling the pool to facilitate efficient water circulation.
Inspect the Pool Area for Debris
After successfully removing and cleaning the pool cover, the next step involves inspecting the pool area for debris. This is essential for your spring pool startup in Sonoma, ensuring a safe and clean environment for swimming. Here’s what you should do:
1. Sweep the surrounding deck and patio to eliminate leaves, dirt, or debris.
2. Use a leaf skimmer to remove floating debris from the pool surface.
3. Inspect landscaping around the pool for fallen branches or potential contaminants.
4. Check for any forgotten items like furniture or pool toys that may obstruct access.
Maintaining a clean pool area is vital during your pool preparation for spring, as it prevents contaminants from entering the water and promotes safety. Additionally, ensuring proper water circulation will help maintain a clean pool environment as you prepare for the warmer months ahead.
Check and Repair Pool Equipment
Begin by thoroughly checking and repairing your pool equipment to verify everything is in ideal condition for the season ahead. Inspect the pool pump for leaks and confirm it runs smoothly; a malfunctioning pump can hinder circulation. Clean or replace filter cartridges and backwash sand filters to maintain water quality. Test the pool heater to avoid delays in your swimming season. Check hoses, clamps, and fittings for any signs of damage, as even minor leaks can cause significant water loss. Finally, reattach winterizing plugs from skimmers and wall returns to confirm proper water flow. Remember that maintaining your pool filter system is essential for keeping your water clear and clean.
| Equipment | Inspection Needed | Action Required |
|---|---|---|
| Pool Pump | Check for leaks and operation | Repair or replace |
| Filter System | Inspect cartridges and sand | Clean or replace |
| Pool Heater | Test functionality | Repair if needed |
| Hoses | Look for damage or leaks | Replace if damaged |
Fill the Pool to the Correct Water Level
To guarantee ideal pump and skimmer functionality, it is vital to fill the pool to the midpoint of the skimmer opening, typically halfway up the tile line. Follow these steps to ascertain proper filling:
1. Use a garden hose or submersible pump to refill the pool.
2. Monitor the water level closely to prevent overflow and avoid debris entering.
3. Check fittings and hoses for leaks as the water rises.
4. After filling, assess the pool’s clarity and water quality before moving on to chemical treatments.
Maintaining the correct water level is essential for peak circulation and filtration. This prevents damage to the pump and guarantees effective cleaning, setting you up for a successful swimming season ahead.
Start the Filtration System
Start up your filtration system to kick off the pool’s spring reopening process. After confirming the water is filled to the appropriate level, activate the system and let it run for at least 12 hours. This will promote proper water circulation and clarity. While the system operates, listen for any unusual noises or check for leaks in the pump and filtration components, as these could signal potential issues. Monitor the flow rate regularly to guarantee efficiency, which is vital for maintaining water quality. Don’t forget to clean or replace filter cartridges as needed to optimize filtration. Over the next few days, observe the water clarity and adjust chemical levels accordingly to achieve a balanced environment for swimming.
Vacuum and Clean Pool Surfaces
Skimming the pool’s surface with a leaf skimmer is essential for removing floating debris before you vacuum the bottom. Once you’ve cleared the surface, follow these steps to guarantee a thorough cleaning:
Skimming the pool’s surface is crucial for removing debris before vacuuming, ensuring a cleaner and clearer pool.
1. Use a pool vacuum designed for your specific surface material—vinyl, fiberglass, or plaster.
2. Vacuum the pool floor in a systematic pattern, covering all areas, especially corners and tight spots.
3. After vacuuming, brush the pool walls with a suitable brush to dislodge any stubborn dirt or algae.
4. Establish a regular vacuuming schedule, performing this task at least once a week during the swimming season to maintain water clarity and hygiene.
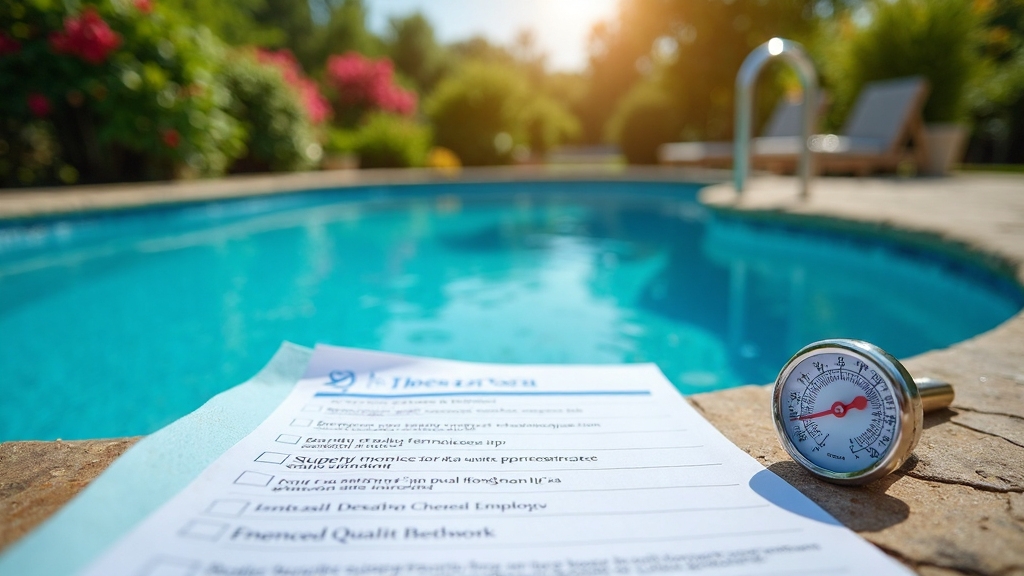
Test Water Chemistry Levels
Testing water chemistry levels is essential for maintaining a safe and enjoyable swimming environment. Begin by measuring pH, alkalinity, chlorine, and calcium hardness. Aim for a pH between 7.2 and 7.6, which optimizes chlorine effectiveness and swimmer comfort. Monitor total alkalinity, verifying it stays between 80 and 120 ppm to stabilize pH levels and prevent fluctuations. Free chlorine should be maintained between 1.0 and 3.0 ppm to effectively eliminate bacteria and inhibit algae growth. After adjusting chemical levels, wait 24 hours before retesting to confirm all parameters are within the recommended ranges. This proactive approach guarantees a balanced pool, promoting safety and enhancing your swimming experience as you welcome the warmer months ahead.
Balance Chemical Levels
Once you’ve confirmed that your water chemistry levels are within the recommended ranges, the next step is to balance the chemical levels for ideal pool performance. Proper balancing guarantees safety and efficiency, enhancing your swimming experience. Follow these key steps:
1. Adjust pH: Aim for a pH range of 7.2 to 7.6 to optimize chlorine effectiveness and swimmer comfort.
2. Regulate Alkalinity: Maintain total alkalinity between 80 to 120 ppm to stabilize pH levels and avoid fluctuations.
3. Monitor Free Chlorine: Keep free chlorine levels between 1.0 to 3.0 ppm to effectively sanitize the water and inhibit algae growth.
4. Check Calcium Hardness: Ascertain calcium hardness is between 200 to 400 ppm to protect your pool surfaces and equipment from damage.
Inspect the Pool Liner
Before filling your pool, it’s crucial to inspect the pool liner thoroughly to affirm its integrity. Start by checking for any visible cracks, tears, or bubbles that could lead to leaks and compromise water retention. Confirm the liner bead is securely fastened in the coping track to prevent dislodgment during filling. Run your hands over the surface to identify rough areas or signs of fading, which may indicate age or chemical damage. Pay close attention to any wrinkles, as these can disrupt water circulation and should be addressed promptly. If you notice significant wear and tear, consider replacing the liner to guarantee peak performance and maintain the aesthetic appeal of your pool.
Reattach Pool Accessories and Safety Features
Reattaching pool accessories and safety features is essential for guaranteeing a safe swimming environment. Follow these steps to secure your pool properly:
Reattaching pool accessories and safety features is crucial for ensuring a safe swimming environment.
1. Check all accessories: Verify ladders, handrails, and diving boards are securely reattached to prevent accidents.
2. Lubricate components: Apply lubricant to bolts and screws to prevent rust and facilitate easy removal when necessary.
3. Inspect safety features: Confirm that pool alarms and drain covers are intact and functioning properly to enhance swimmer safety.
4. Reinstall additional safety equipment: Verify life rings and safety ropes are in place to comply with local regulations and promote safety.
Frequently Asked Questions
What Is the First Thing You Should Do When Opening a Pool?
When opening your pool, the first step is to carefully remove the cover. Make sure to pump off any standing water and clear away debris to prevent contamination. Once the cover’s off, inspect the pool for water clarity and overall condition. Look for any visible cracks or damage in the liner that may require repairs. This initial assessment is essential for ensuring a safe and enjoyable swimming environment for the season ahead.
What Are the Requirements for a Pool Fence in Sonoma County?
In Sonoma County, about 50% of pool-related accidents involve children, making proper fencing essential for safety. Your pool fence must be at least 5 feet high, with no gaps larger than 4 inches to deter climbing. Gates should be self-closing and self-latching, with latches positioned at least 54 inches off the ground. Additionally, the fence should be at least 18 inches away from the pool edge, constructed from durable materials, and well-maintained.
What Order to Add Pool Chemicals When Opening?
When opening your pool, start by testing the water for pH, alkalinity, and chlorine levels. If alkalinity’s low, add ARM & HAMMER Baking Soda and let it circulate for 20-30 minutes. Then, adjust pH with soda ash to maintain a range of 7.2 to 7.8. After balancing, shock the pool with liquid chlorine or calcium hypochlorite, targeting 5 to 10 ppm. Finally, wait for chlorine levels to drop below 3.0 ppm before swimming.
What Is Typically Included in a Pool Opening?
When it’s time to reveal your pool from its winter slumber, you’ll need to do more than just peel back the cover. Typically, you’ll start by inspecting and cleaning the cover, then reconnecting all equipment, ensuring everything’s in tip-top shape. Adjusting the water level is essential before you test and balance the chemistry. Don’t forget to clean the surfaces and check safety features for compliance—your summer oasis deserves the best preparation!